
Let’s see how to send the data collected by a Chat Funnels flow to n8n using a webhook.
When a user completes a Chat Funnel, Joinchat can automatically send all the collected data to an external system via webhook. Connecting it to n8n lets you do anything you want with that data: save it to a spreadsheet, send it to a CRM, trigger an email, create a task… whatever you need.
In this tutorial, we’ll focus on the first and most important step: how to receive the Chat Funnels webhook in n8n. Once the data reaches n8n, the possibilities are endless.
Part 1 — Set up the Webhook node in n8n
1.1 Create a new workflow
In your n8n dashboard, create a new workflow. The starting point will always be a Webhook node, which will act as the receiver for the data sent by Chat Funnels.
1.2 Add the Webhook node
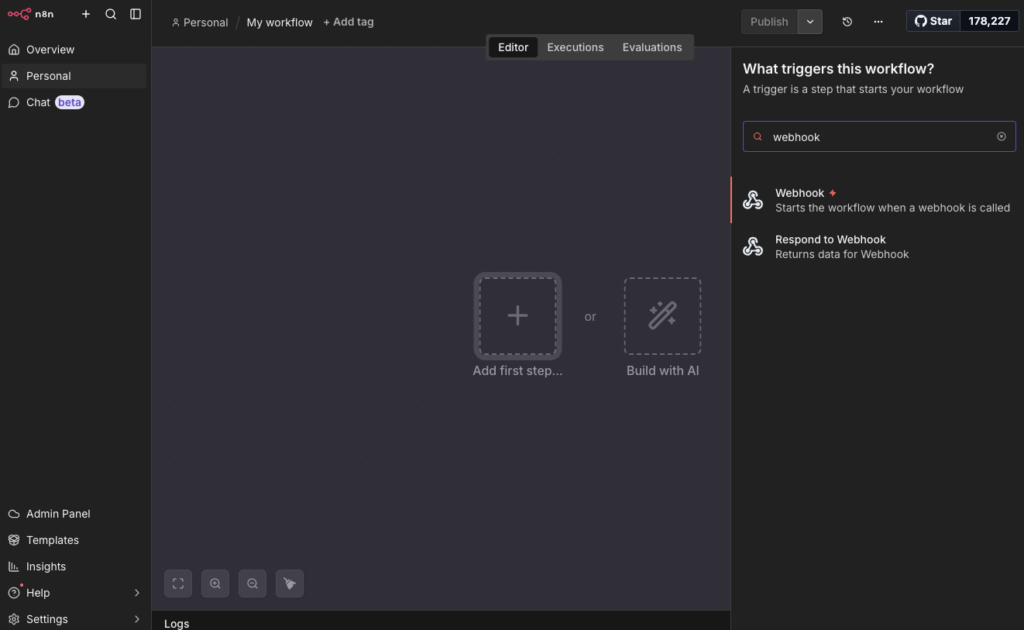
Click Add first step and search for Webhook. Select it — you’ll see it appear as a trigger node, meaning it starts the flow when data comes in.
1.3 Configure the node
When you open the node, you’ll see two important things at the top: the Test URL and the Production URL. These are two different URLs for two different stages:
- Test URL — use it while setting things up and testing. It lets you see the data in real time inside the n8n editor.
- Production URL — use it when everything is ready and you want the flow to run permanently. To activate it, you need to publish the workflow.
To get started, make sure the node has this configuration:
- HTTP Method: POST
- Path: you can leave it random or customize it, for example
chatfunnels - Respond: Immediately (n8n will respond with OK as soon as it receives the webhook, without waiting for the rest of the flow to finish)
1.4 Copy the Test URL
Copy the Test URL — you’ll need it in the next step to configure Chat Funnels. It looks like this:
https://your-instance.n8n.cloud/webhook-test/chatfunnels
Code language: JavaScript (javascript)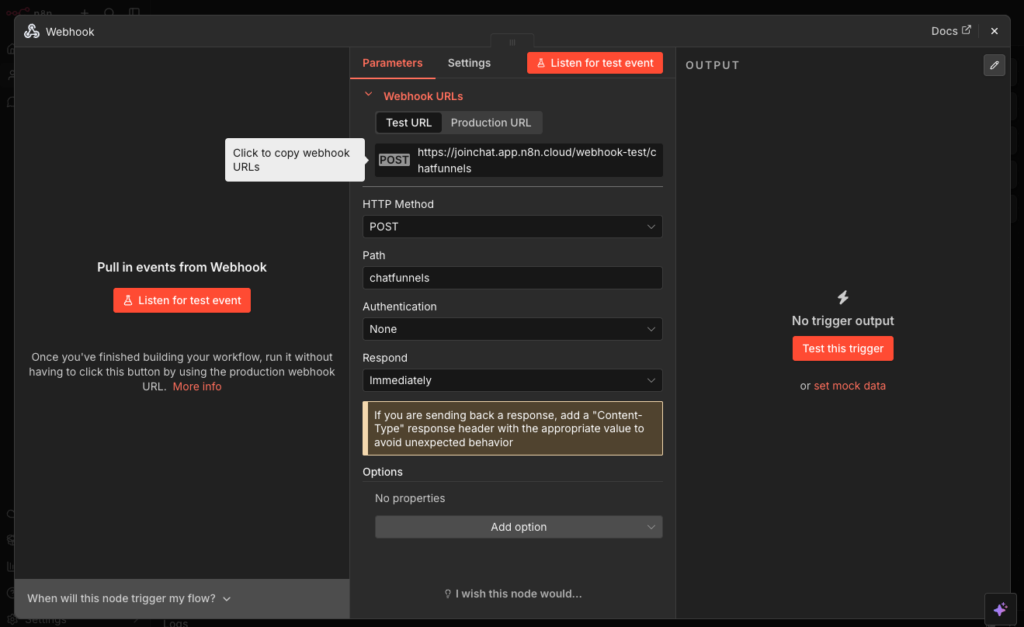
Part 2 — Set up the webhook in Chat Funnels
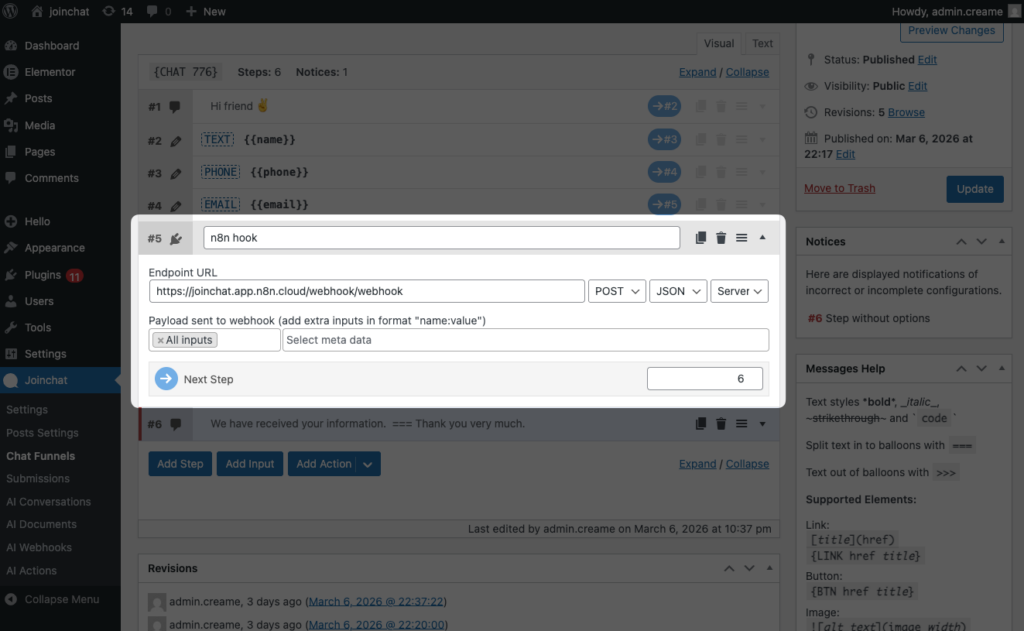
In the step of your funnel where you want to capture the data, add a Webhook block and configure it like this:
- Endpoint URL: paste the n8n Test URL
- Method: POST
- Format: JSON
- Data sent: select the funnel fields you want to send
Part 3 — Test the connection
3.1 Put n8n in listening mode
Back in n8n, click the Listen for Test Event button (the orange button at the top of the node). n8n will wait for 120 seconds to receive a request.
⚠️ It’s important to do this before launching the funnel. If the time runs out, just click the button again.
3.2 Complete the funnel
Activate your Chat Funnel and complete it as if you were a real user. The moment the flow reaches the webhook step, Chat Funnels will send the data to n8n.
3.3 Verify that the data arrives
If everything is set up correctly, n8n will show the received data in the editor, including the full Chat Funnels payload structure. You’ll see something similar to this:
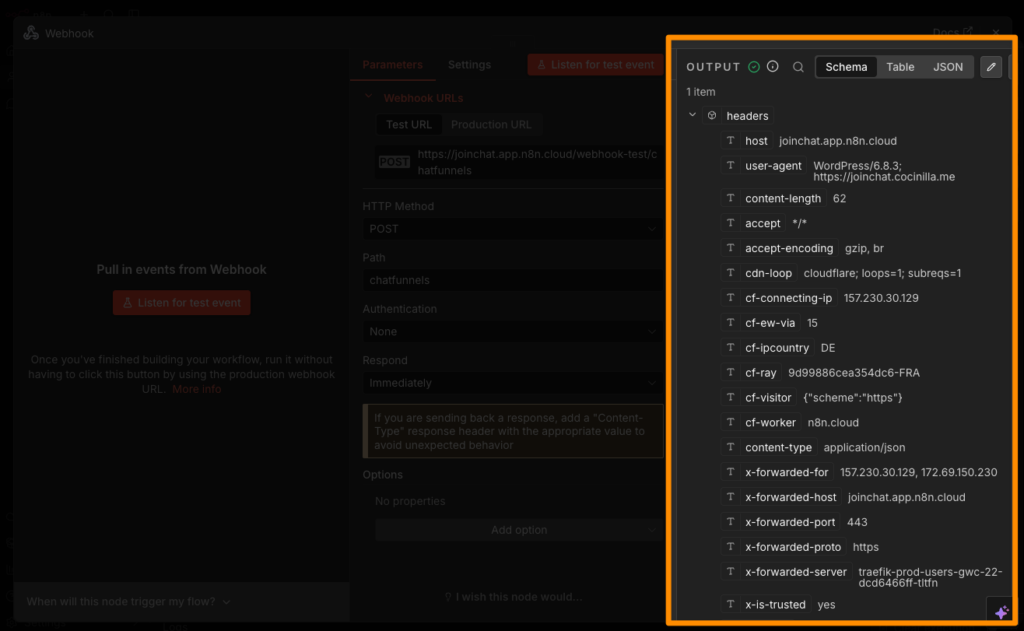
And in the JSON tab, you’ll see code similar to this:
[
  {
    "headers": {
      "host": "joinchat.app.n8n.cloud",
      "user-agent": "WordPress/6.8.3; https://join.chat",
      "content-length": "62",
      "accept": "*/*",
      "accept-encoding": "gzip, br",
      "cdn-loop": "cloudflare; loops=1; subreqs=1",
      "cf-connecting-ip": "000.000.00.000",
      "cf-ew-via": "15",
      "cf-ipcountry": "DE",
      "cf-ray": "9d99886cea354dc6-FRA",
      "cf-visitor": "{\"scheme\":\"https\"}",
      "cf-worker": "n8n.cloud",
      "content-type": "application/json",
      "x-forwarded-for": "000.000.00.000, 000.000.00.000",
      "x-forwarded-host": "joinchat.app.n8n.cloud",
      "x-forwarded-port": "443",
      "x-forwarded-proto": "https",
      "x-forwarded-server": "traefik-prod-users-gwc-22-dcd6466ff-tltfn",
      "x-is-trusted": "yes",
      "x-real-ip": "000.000.00.000"
    },
    "params": {},
    "query": {},
    "body": {
      "name": "Peter",
      "phone": "125636547",
      "email": "peter@gmail.com"
    },
    "webhookUrl": "https://joinchat.app.n8n.cloud/webhook-test/chatfunnels",
    "executionMode": "test"
  }
]This confirms that the connection is working and that n8n is correctly receiving the funnel data.
Part 4 — Move to production
Once you’ve verified that everything works in test mode, there are two steps to activate the flow permanently:
- In n8n, switch the Webhook URLs from Test URL to Production URL

- Copy the production URL again and update it in your Chat Funnel.
- In n8n, click Publish to activate the workflow
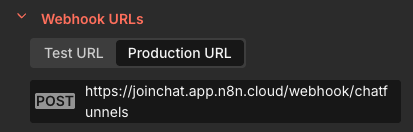
From that moment on, every time a user completes the funnel, the data will be sent to n8n automatically, without needing to be in listening mode.
Note: the data flowing through the Production URL is not shown in the editor. To review it, go to the Executions tab in your workflow.
What’s next?
With the webhook working, your funnel data is now inside n8n. The next step is to connect whatever you want to do with it: save it to Google Sheets, send it to a CRM, notify your team… Each use case has its own tutorial.