
Let’s see how to send the data collected by a Chat Funnel to Zapier using a webhook.
When a user completes a Chat Funnel, Joinchat can automatically send all the collected data to an external system via webhook. Connecting it with Zapier lets you do almost anything with that data: save it to a spreadsheet, send it to a CRM, trigger an email, create a task… whatever you need.
In this tutorial, we’ll focus on the first and most important step: how to receive the Chat Funnels webhook in Zapier. Once the data arrives, the possibilities are endless.
Part 1 — Configure the Webhook node in Zapier
1.1 Create a new Zap
In the Zapier dashboard, create a new Zap. The starting point will always be a Webhook node, which will act as the receiver for the data sent by Chat Funnels. If you want Zapier to create it for you, use Copilot. You can start with something like this 👇
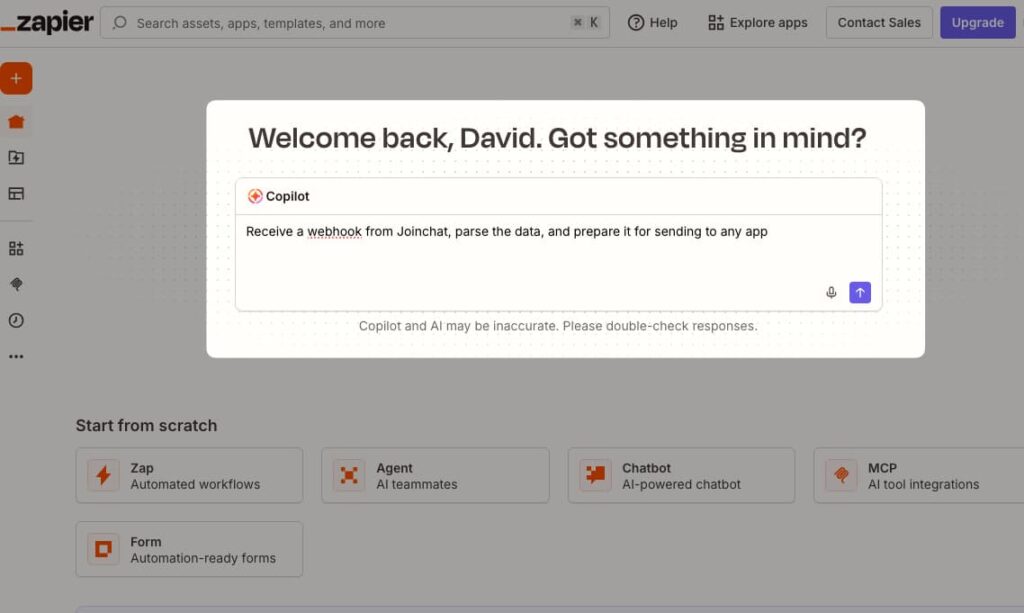
Once you finish explaining to Copilot what you want to create, in this case, we asked it to create a new contact in our CRM, Trengo, when it receives the webhook. You’ll see a message similar to this one. Click Continue with Zap editor.
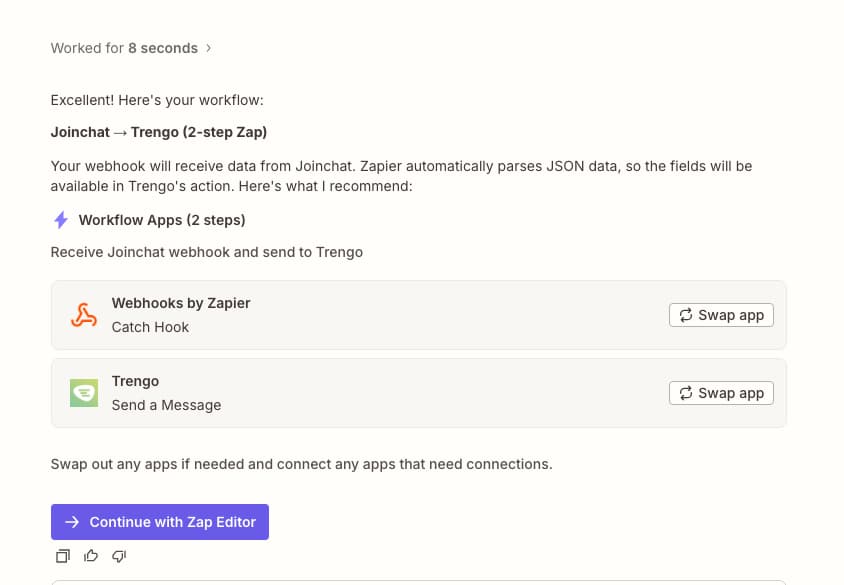
1.2 Edit the Webhooks by Zapier node
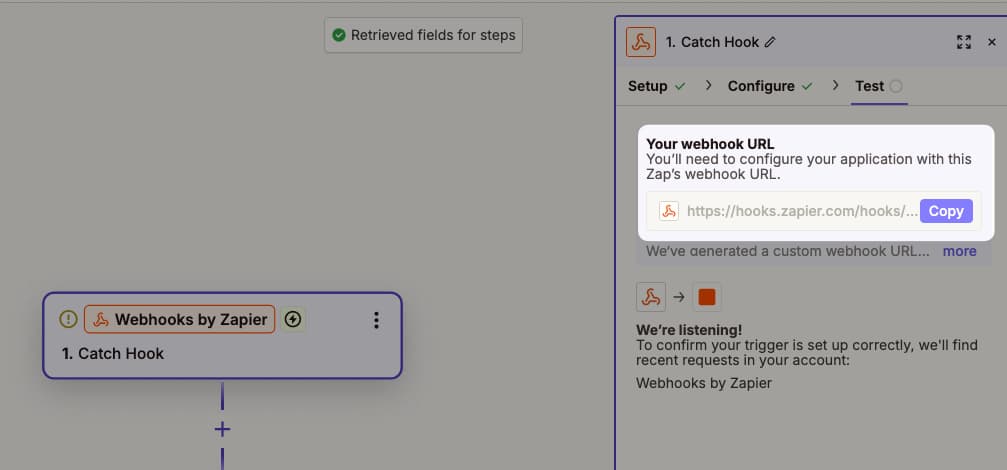
Click 1. Catch Hook and, on the right-hand side, click Copy. This is the hook URL you need to paste into your Chat Funnel, in the Webhook step.
1.3 Configure the webhook in Chat Funnels
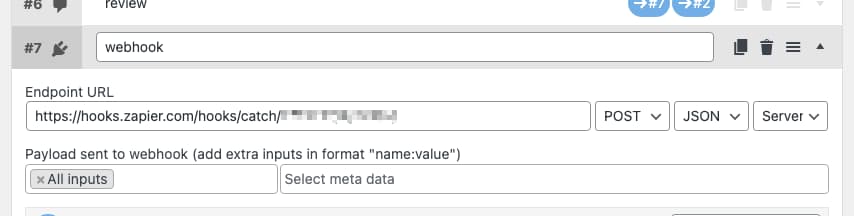
In the step of your funnel where you want to capture the data, add a Webhook block and configure it like this:
- Endpoint URL: paste the Zapier Webhook URL:
https://hooks.zapier.com/hooks/catch/... - Method: POST
- Format: JSON
- Request source: Server
- Data sent: select the funnel fields you want to send
1.4 Trigger the hook and receive the data
Once the webhook URL has been configured in your Chat Funnel, run it through to the end so Zapier can receive a new record. You can send as many records as you want. If you make changes to the Chat Funnel fields, you’ll need to send a new record to Zapier so you can use those fields later.
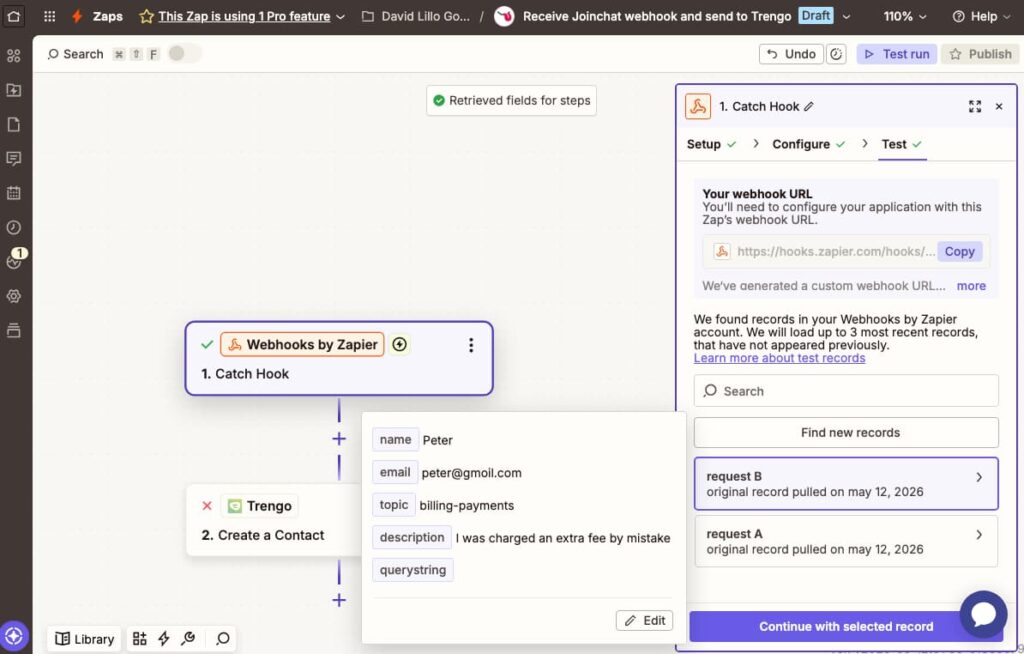
From this point on, every time a webhook is triggered from Joinchat, Zapier will be ready to read its data, and you’ll be able to send that data wherever you want by adding the next step to your Zap.
Part 2 — Create a contact in Trengo
2.1 Add the Trengo app in Zapier
In our example, we decided to connect Chat Funnel with our CRM, Trengo, creating a new contact with the data collected from our Joinchat conversational form. Of course, Zapier will ask you for access to the tool you want to connect. We’ll skip that part here.
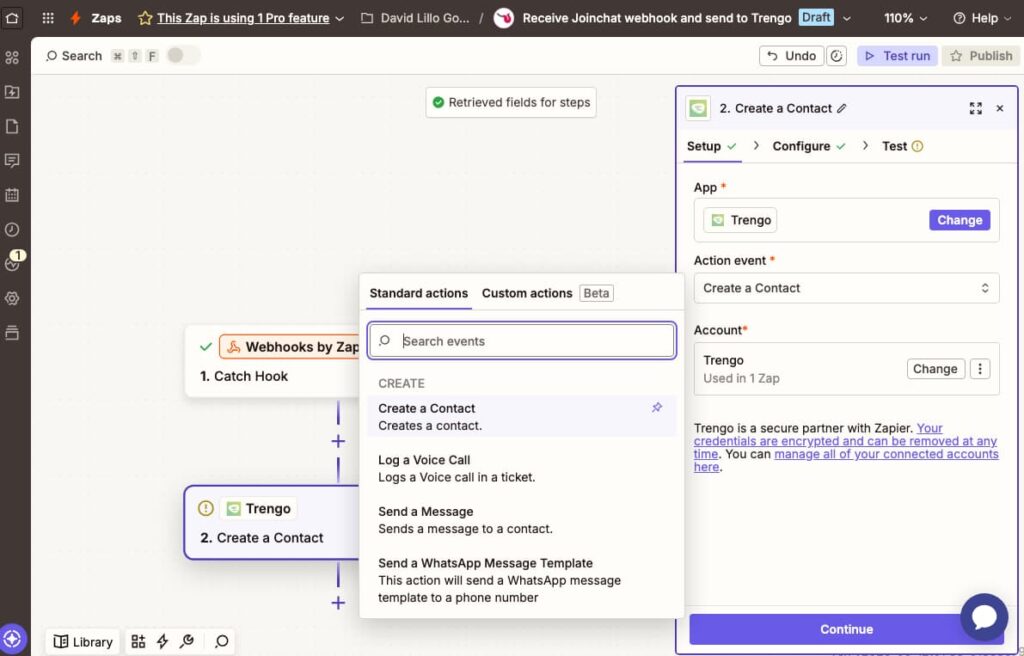
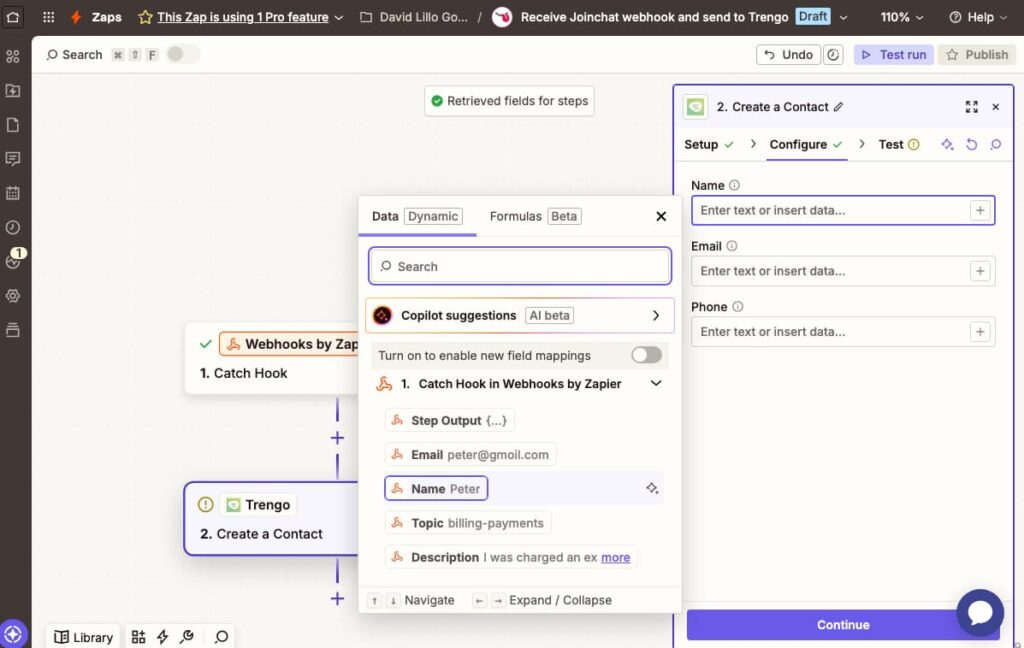
2.2 Configure the fields you want to save
Configure the node, place each record in its corresponding field, and click Continue.
In the next step, run the Test and, if everything worked correctly, you can publish the Zap.
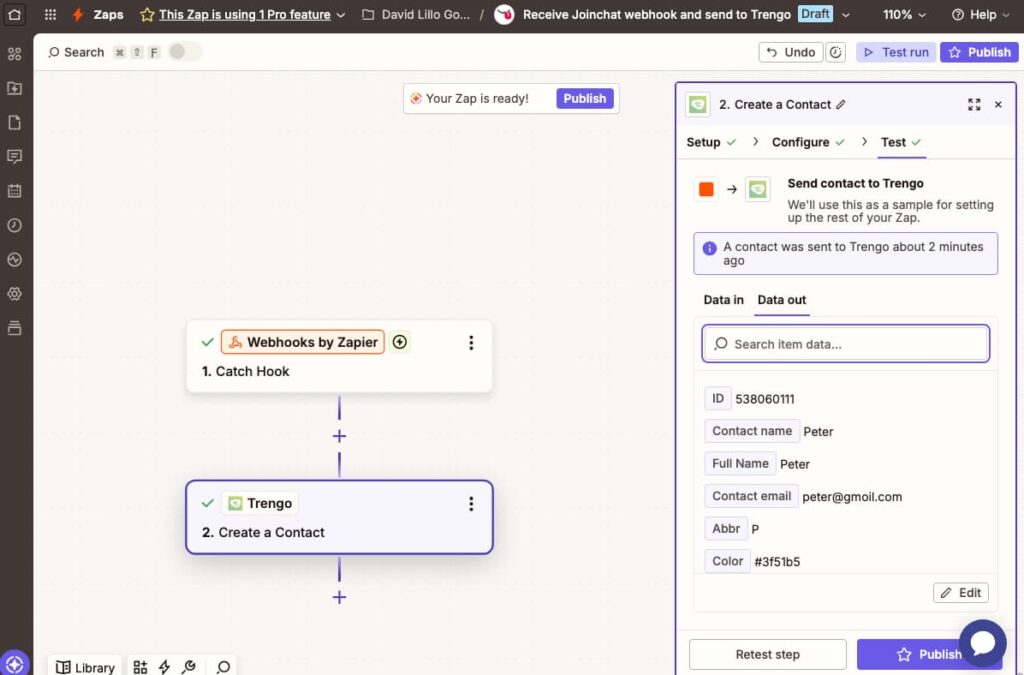
2.3 Verify that the data arrives
If everything is set up correctly, Trengo will have received the instruction and created a new contact. You’ll see something similar to this:
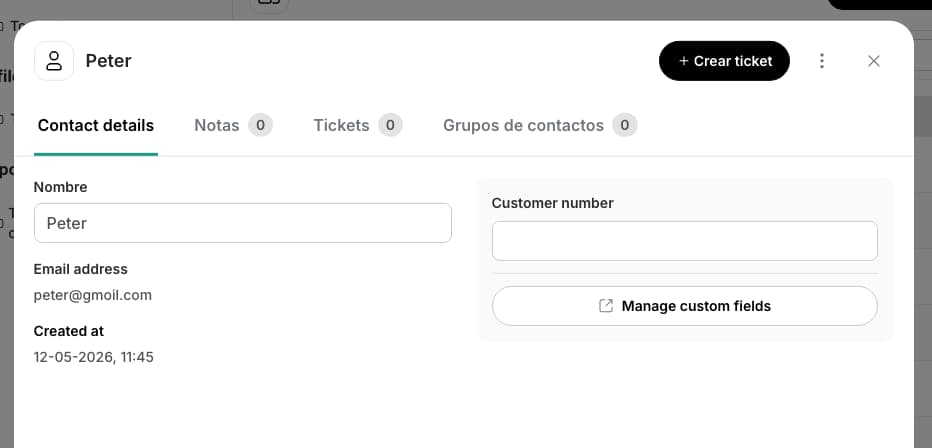
This confirms that the connection works and that Zapier is correctly receiving the funnel data and executing the step to create a new contact in Trengo.
What’s next?
With the webhook working, your funnel data is now inside Zapier. The next step is to connect whatever you want to do with it: save it in Google Sheets, send it to a CRM, notify your team…